


Robin and Paul

Trailer Parts,
Service, Sales and Rentals
2003 Chevy Express /
GMC Trailer Brake Controller Install
(Other years may be the
same)
"Standard" Wire colors to the
controller (Tekonsha and others):
Black, Battery Positive to controller
White, Negative Ground for Controller
Blue, Brake feed from controller to
Trailer plug at back of truck
Red, tap into truck Brake light switch
signal to tell controller to apply brakes
Remember, the above colors are just a
GUIDE. your colors may be different, read the
instructions!
Robin and Paul
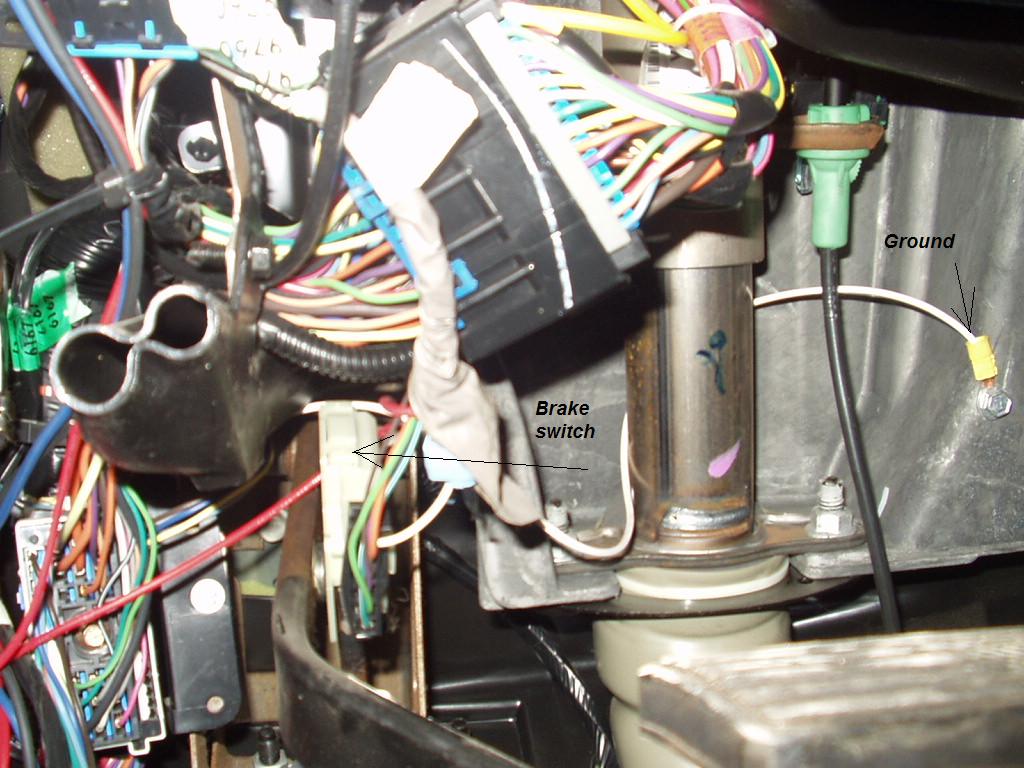
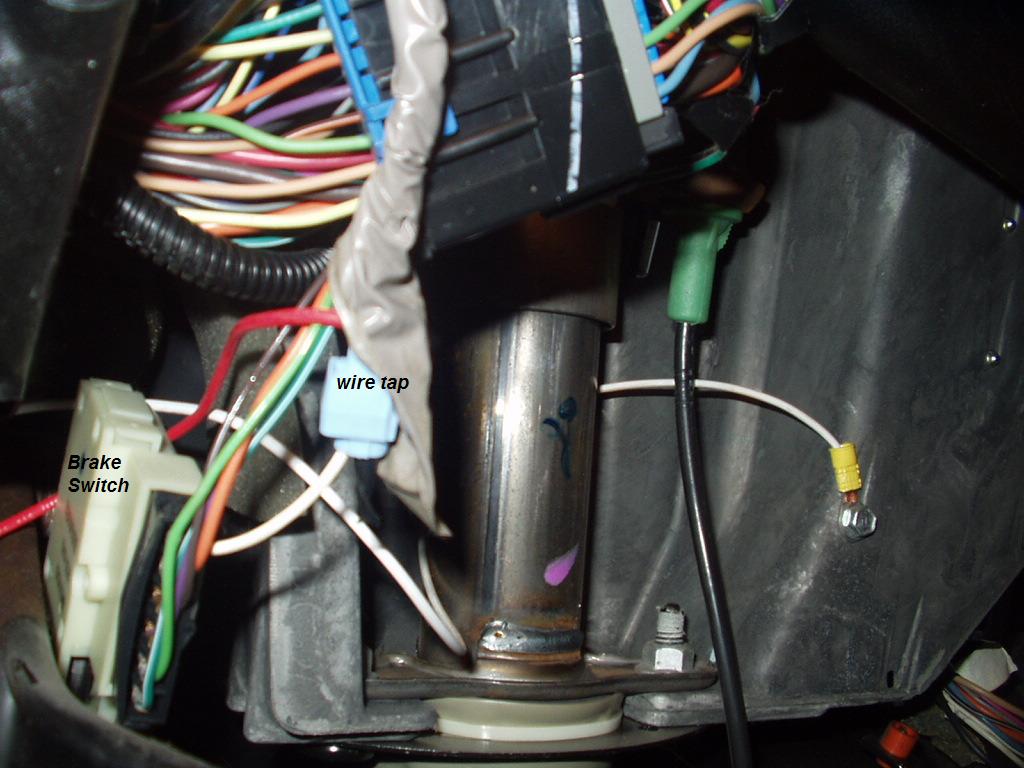
We found the brake light switch tap on
the switch. It was the white wire, second or third from
the end (from the back of the truck) The picture
shows looking up from the floorboard.
Get a test light and test all the pins
on this plug, looking for the one that lights up when you
press the brake pedal. The brake light switch is
very hard to reach, but with a probe tester, look for a
wire under the dash that lights with the brake lights. You
are probabally looking for a small gauge white wire (seems
most GM trucks of this era used white). Tap into the
wire for the brake light feed (red wire on most
controllers)
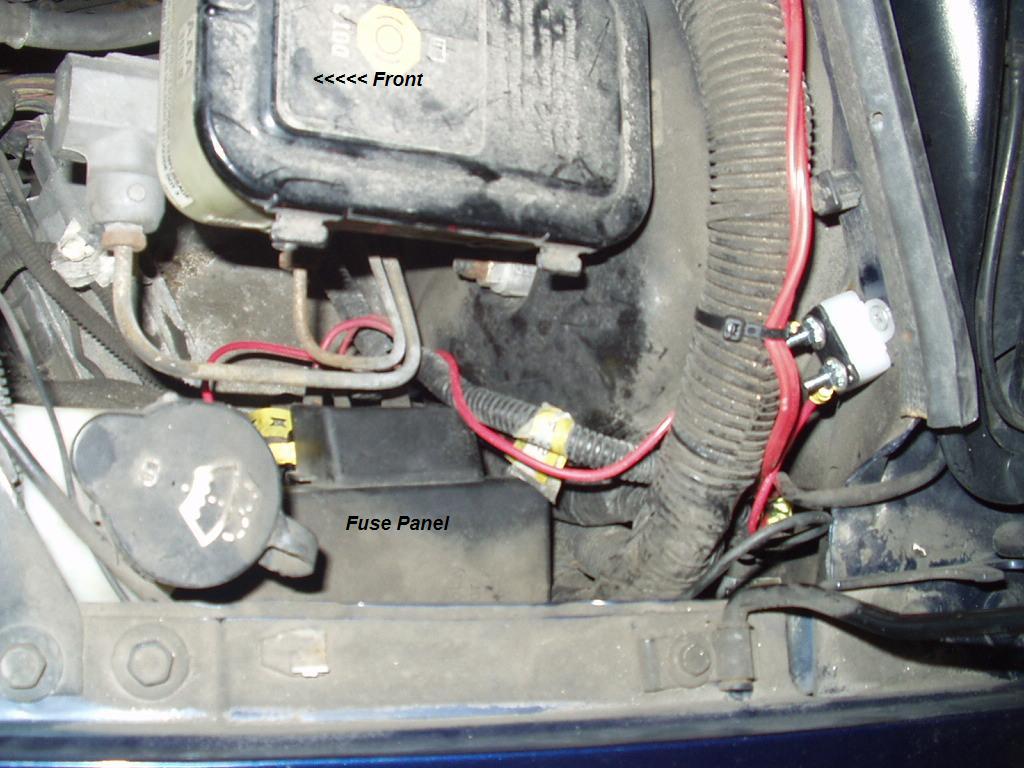
For power, we ran a wire through the
firewall, and tapped onto the fuse panel under the hood,
through a 20 amp Fuse or Circuit Breaker.
We grounded the controller under the
dash to a ground screw. Easy.
The blue (brake wire to plug) was
simply passed through a hole in the firewall and ran along
the frame to the back plug on the truck. (making sure to
use lots of tie wraps to keep the wire awy from hot and
moving parts)
We used a 20 amp fuse Circuit Breaker
to power the brake controller, AND supply power to the 12
Volt power terminal on the trailer plug. This truck
did not have wire ran to the back, so we used our 2 conductor brake wire and ran it ourself. Drilled a small
3/8" hole in a rubber plug in the fire wall to run the
wire to the brake controller under the dash.
Click on any picture for a larger view
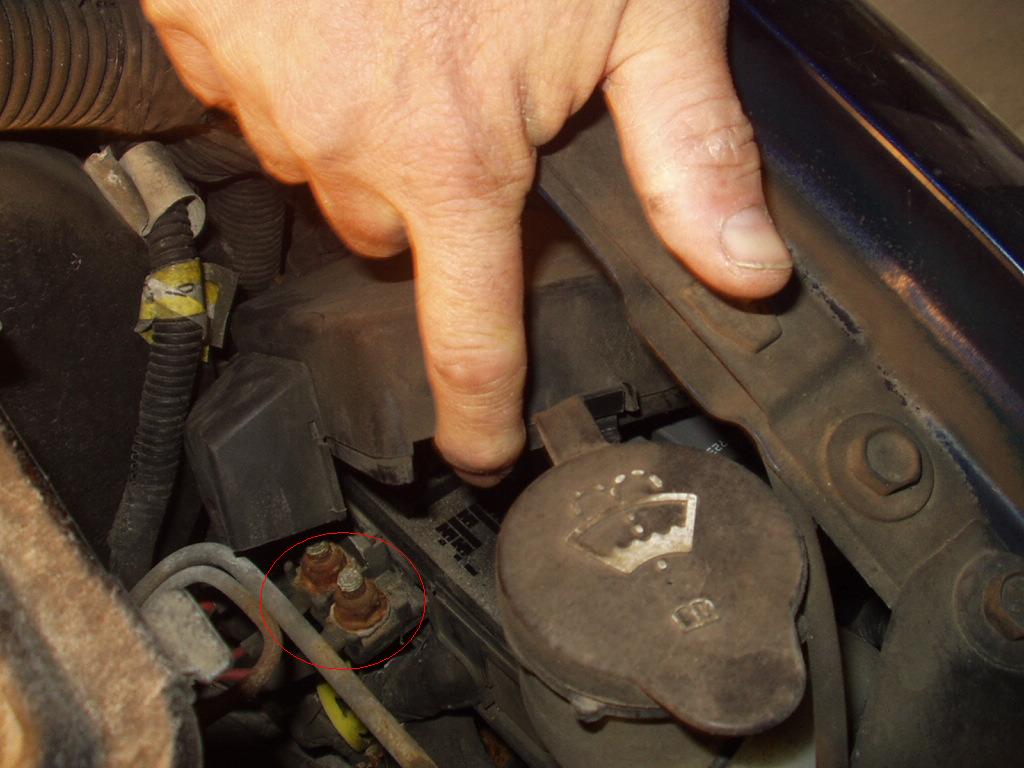
UNDER THE HOOD:
We removed one of the main power feed
nuts on the fuse panel, and with a ring connector, got
power to the Circuit breaker, to feed to controller
From here, the blue wire from the
brake controller is simply ran through the firewall from
under the dash, down under the truck, to the Trailer plug
at the back of the Van (not shown, it is simple to
understand, but a pain to do!)
Make sure the wire is out of harms way
when you run it to the back.