|
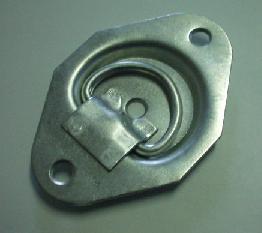
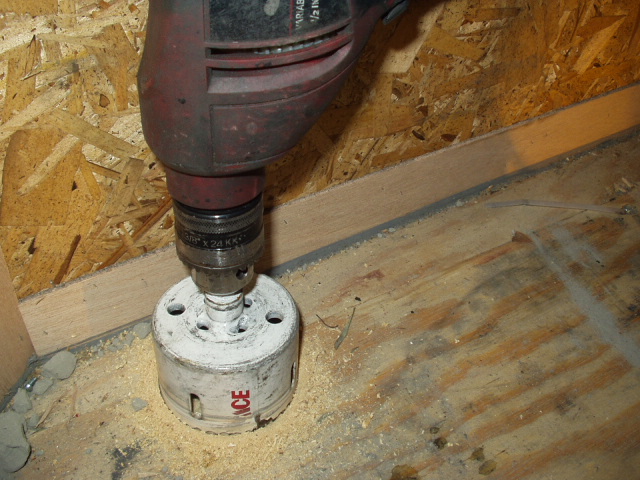
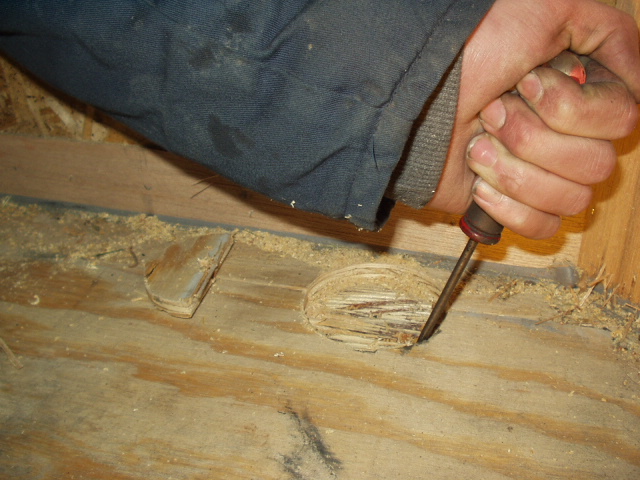
This does take some time. I use a 3" hole saw, but a router will work too. First I locate a existing frame member, as I prefer to attach the D Rings directly to the frame. You can see the screws used to hold the floor down in you trailer. Use those to locate the frame underneath. If you must install between the frame members, I use a piece of steel plate, 12 Gauge or thicker, as a large washer, preferably large enough to reach the frame cross members on each side, or a piece of 3 x 3 x .125 angle iron, again, long enough to reach the frame cross members. I use a jack and block of wood to hold it up against the bottom of the trailer while I am drilling the holes from above. I cut a 3" hole, down about 3/8" into the floor, and use a screw driver and "pop out" the center the hole saw left (with a router you wont have to do that). I set the center of the "pilot bit" on the hole saw very shallow, so it does not drill through the frame while I am cutting the 3" hole. With plywood floors, the center of the hole will split off and lift out. It may take a little time to clean out the hole deep enough. I think many trailer manufactures, when installing them at the factory, just cut the 3" hole all the way through the floor. The D ring will cover the hole anyway. To actually install the D ring, I use self taping screws, So I drill the proper size hole to match the screw I use (7/32" for 1/4" self taping screws) down through the wood and the frame underneath. You can use Bolts and nuts, (I prefer 1/4" or 5/16" Carriage bolts with the smooth heads) but you will need two people to install them as someone will have to be under the trailer tightening the nut. If so, use a drill bit just large enough for the bolt to pass through. I drill the center hole for the D ring first (I use 3 hole, 1200# D rings where all three holes are in a line, so they hit the frame.). I then screw the D ring down with the center screw first, before drill the two outer holes. Before drilling these two holes, I confirm the position of the D ring, making sure it is aligned properly with the frame underneath (or if you used a plate, then just to make sure it is positioned like you want it. Then I drill the two outside holes and screw them down, as above. Repeat as Necessary!
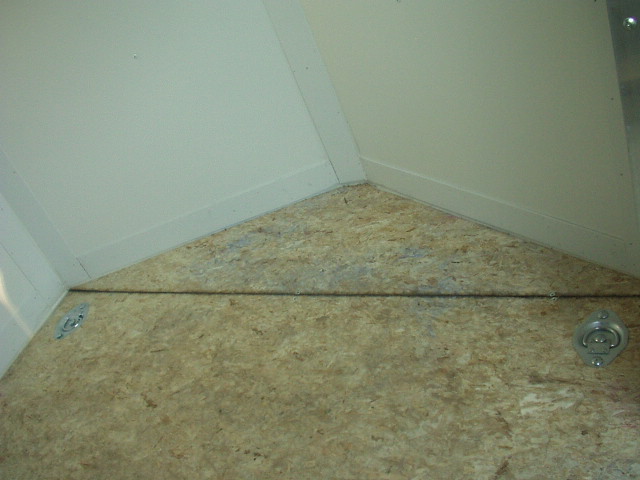
Used a steel plate under these, and carriage bolts. As you can see, they are installed are just behind the frame cross member. (the seam line is over the frame cross member) |