|
2006 Chevy
Colorado Brake Controller Installation
Please visit my general install page
for overall instructions
I sell brake controllers, so
please, if you need one click here! We keep
Prodigy P2 Brake Controllers in Stock Regularly!
"Standard" Wire colors to the controller (Tekonsha
and others):
- Black, Battery Positive to controller
- White, Negative Ground for Controller
- Blue, Brake feed from controller to Trailer plug at back
of truck
- Red, tap into truck Brake light switch signal to tell
controller to apply brakes
Remember, the above colors are just
a GUIDE. your colors may be different, read the
instructions!
TRAILER LIGHTS:
Tail Lights will need a standard tail light 5 wire to 4
wire converter if not already installed from the
factory. These trucks have separate brake lights and
turn signals, so the converter is needed to convert to
standard 4 wire set (brake and turn are the same bulb)
Click
here for a converter
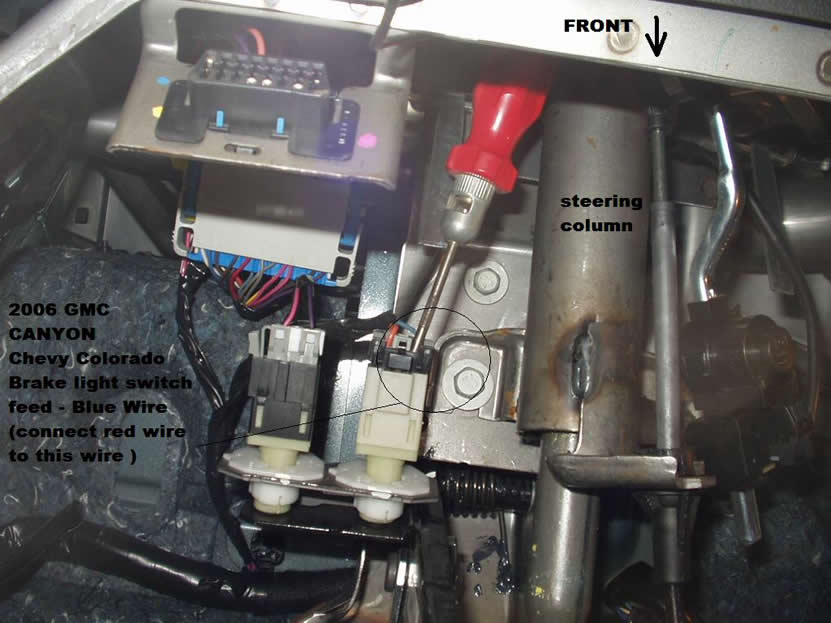
Tap into this wire with a side tap (scotch lock) for the
brake light feed (red wire)
Below, we used standard Brake wire (in red jacket). This
has two wires inside the red jacket, one for 12 volt
power on one for the brake feed. We used the black wire
for battery feed, both to the rear of the truck, and to
power the controller under the dash. The other wire (in
this case) is is white, we used that for the brake wire.
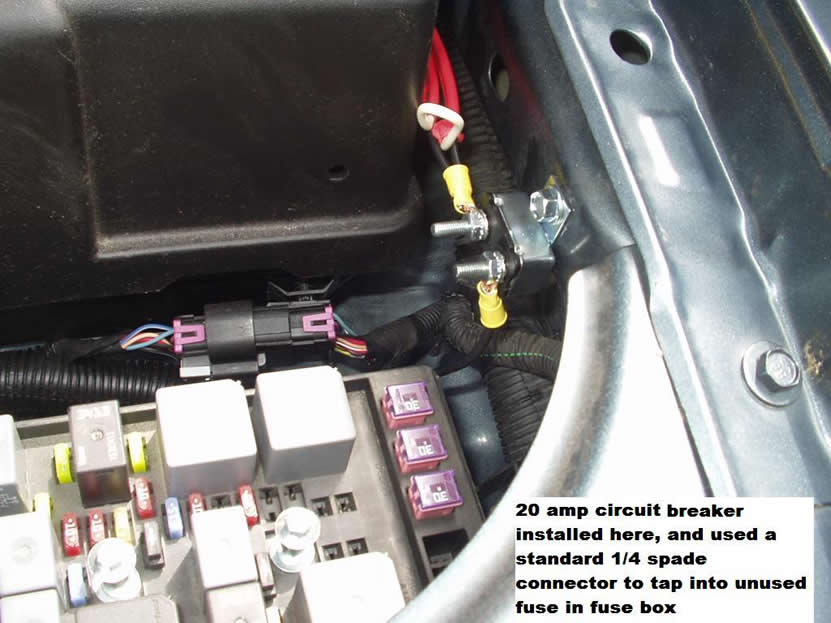
Wire comes from rear of truck, the black wire is cut and
connected to the circuit breaker, then passes through
the fire wall.

Circuit breaker is mounted to fender. Used a standard
1/4" spade and slipped it onto on of the un-used fuse
spots in the fuse block - the red jacketed wire:
black is 12 volt supply, the white is being used for the
brake wire. So, the wire comes from the brake controller
under the dash, over to the relay on the fender. The
wire wire (brake ) is ran directly down to the rear of
the truck, while the black wire is connected to the 12
volts supply, and is connected to both the controller
and the plug on back.
|